Having dealt with the back garden, my next task was to be the kitchen.
Bizarrely, this all came about because my kettle died and I needed to buy a new one. I know, I know. What a strange thing to inspire a kitchen re-vamp, but given that I knew that the kitchen was going to need to be dealt with, I thought that I might as well buy a new kettle that was going to fit in with my new decor. However, at that point, I had no idea what colour scheme I was going to go for.
Grief does funny things to you, and for me, one of the things that I was really affected by was my inability to make a decision about anything. I was frightened to make any permanent decisions that I would then regret, but being obsessed by a good cup of tea ( it was the only constant in my life for a while) I knew I needed a new kettle and fast. So, I put it out to my Interior Design Masters, and we eventually decided on navy blue, yellow and off-white as my colour scheme. I bought a blue kettle and the rest, as they say, is history.
Having received my kettle, it then took me a while to build up the items I required for the kitchen and back room makeover, (as well as the courage). I bought paint, taps, lighting, floor tiles and my lovely pal Wendy gave me some MDF paneling that she had left over from her kitchen makeover.
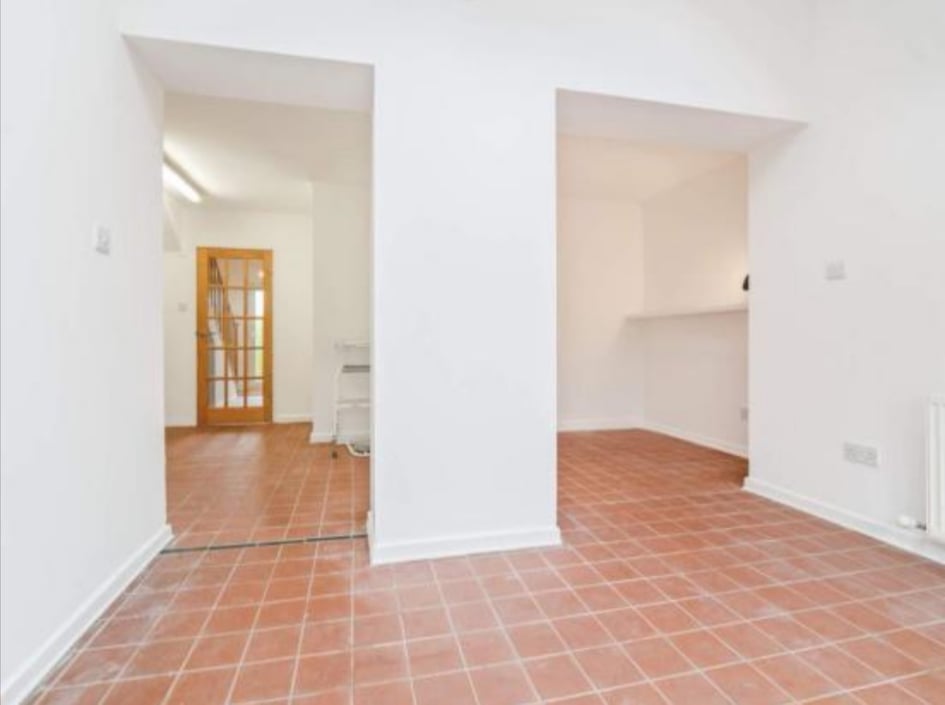
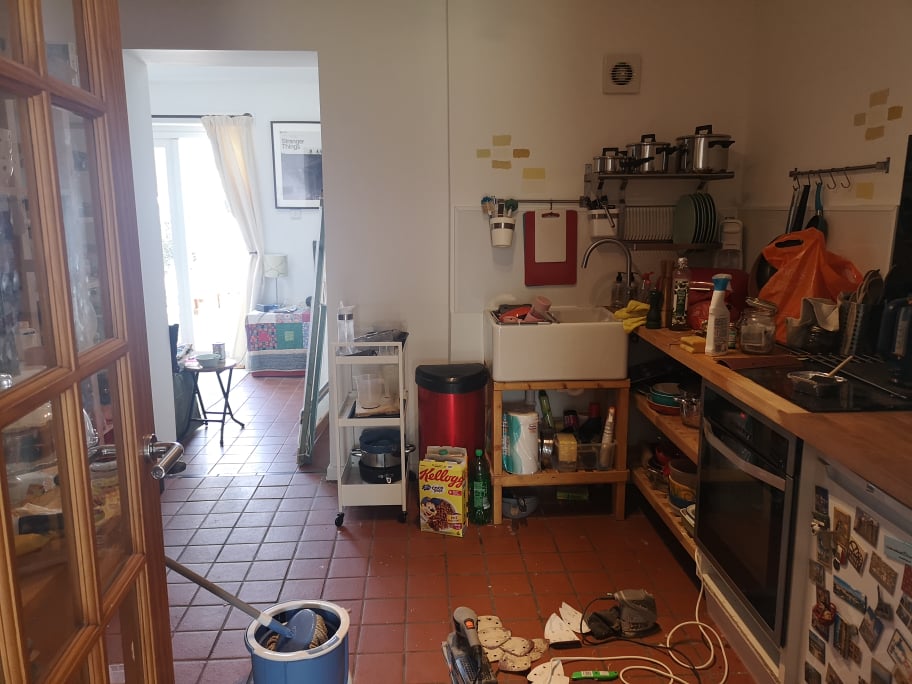
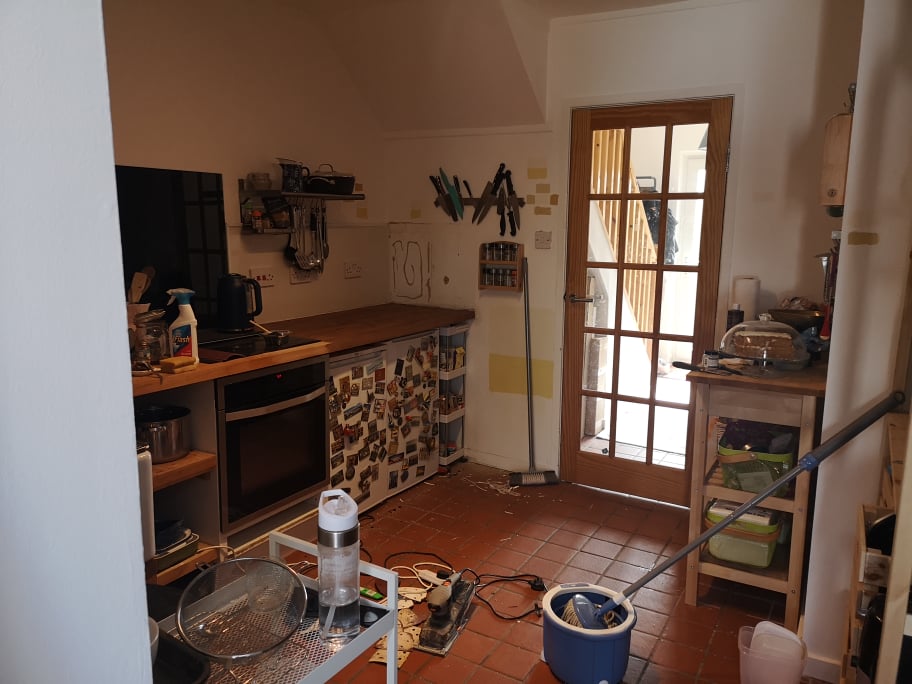
So this is what the kitchen looked like before we moved in.

Not very inspiring. We bought some shelving units that sit opposite the cooker, and a butchers block that goes behind the door. We put up some metal shelves and rails for pots and pans and utensils and mugs, and then we unpacked. WE did nothing else.
Danny was a wonderful cook, so the kitchen was going to be his domain. I was simply going to enact whatever it was that he wanted. So, after he died, I had no ideas about what I was going to do. Until the kettle.
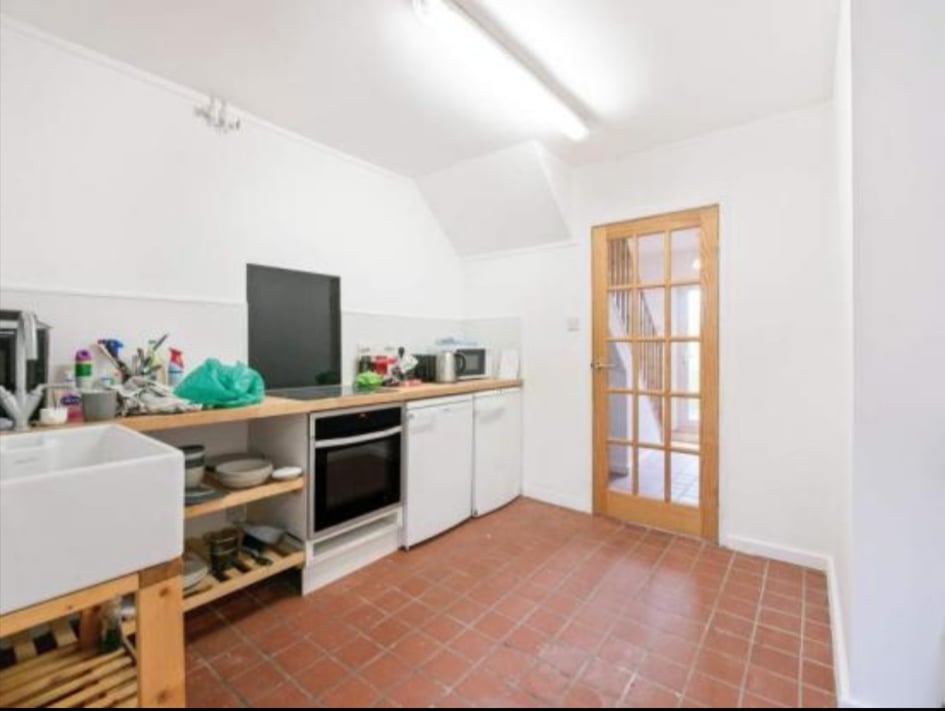
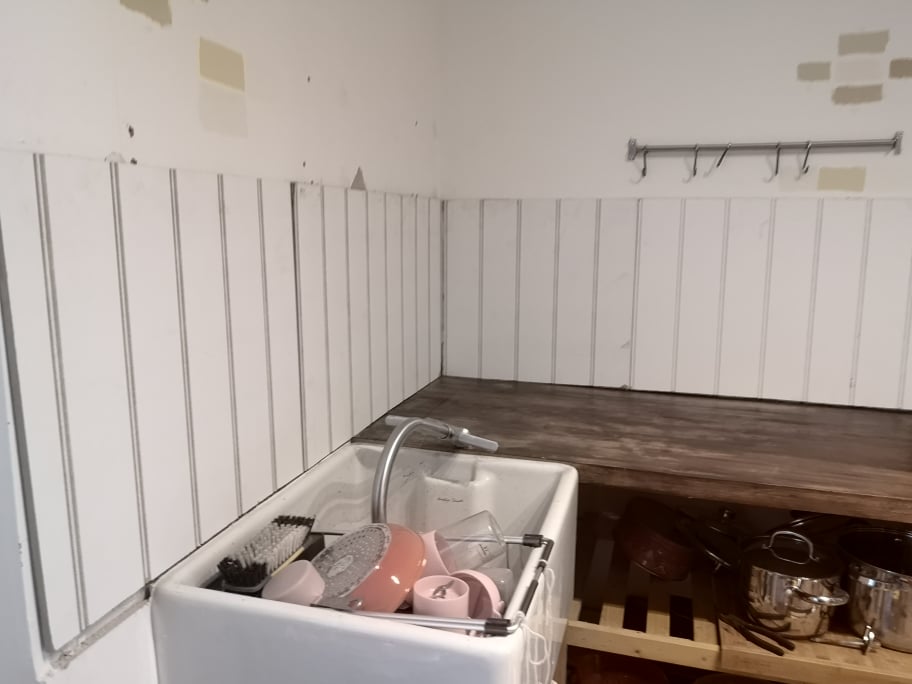
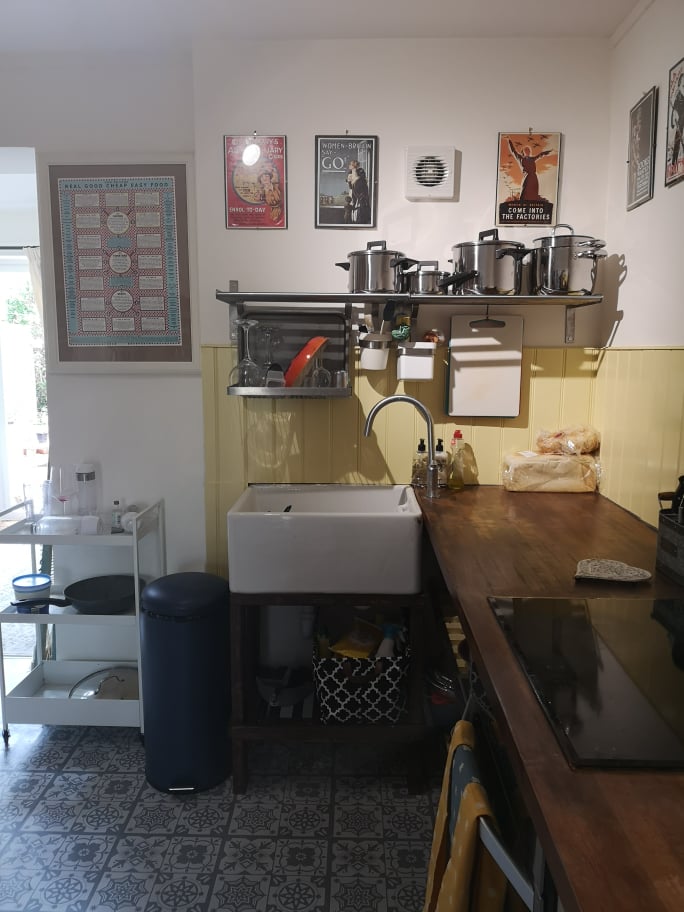
The first thing I did was rip off the horrible plastic paneling that sat at the back of the counter. It was so ugly that it was a relief to see it go. Of course, that’s when I discovered that my counter wasn’t straight, so any paneling I then put up would have a gap at the bottom. Darn. I then sanded back the wooden counters. They had been varnished before, so they took a lot of sanding, and now that I have finished I can see where the stain has not taken as well, so I really needed to have sanded it some more. It looked fine and varnish free, but it just goes to show. Lesson learnt. Next time, I’ll sand it even more.
Having sanded, stained and varnished the counters, I then put up my paneling. I decided to take it past the counter edge and the edge of the sink and drop it down to the floor. I used all the paneling I had and patched some of it, so it looks a little messy in places, but again, lessons learnt.
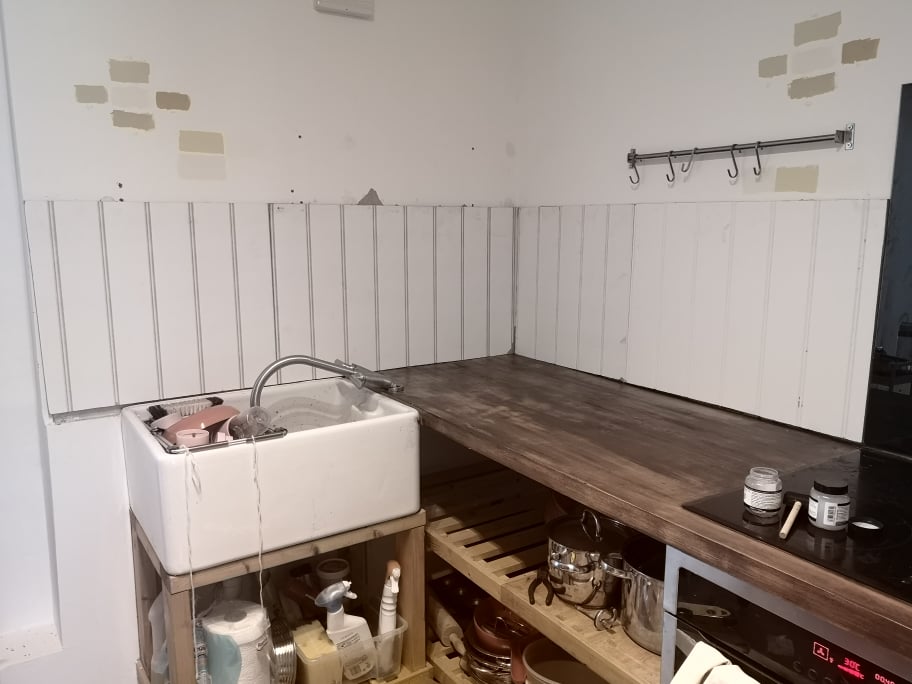
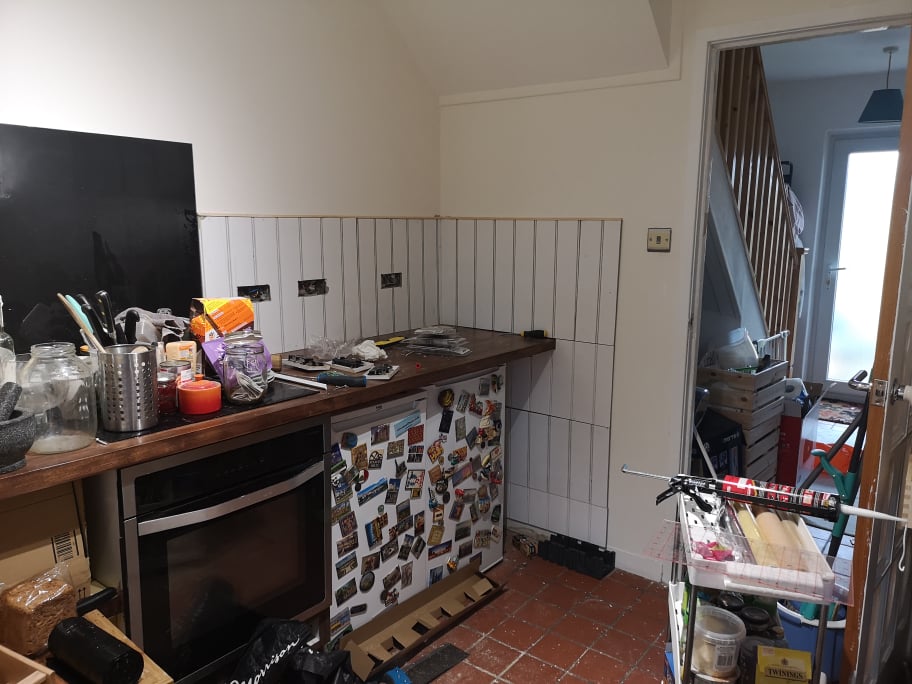
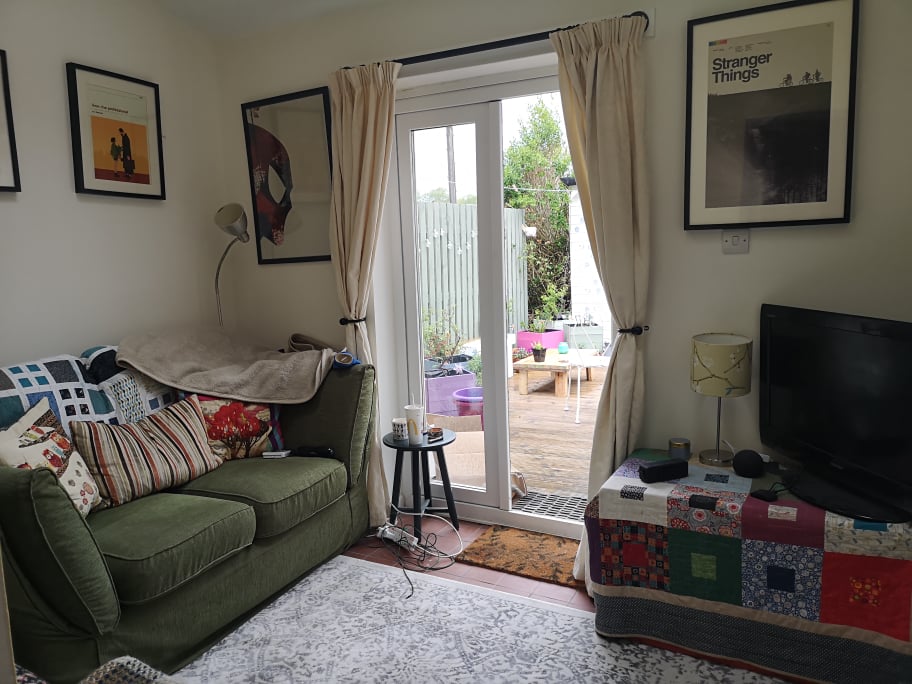
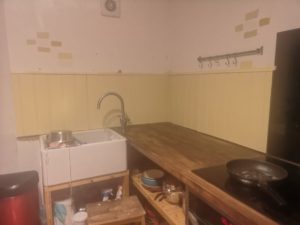
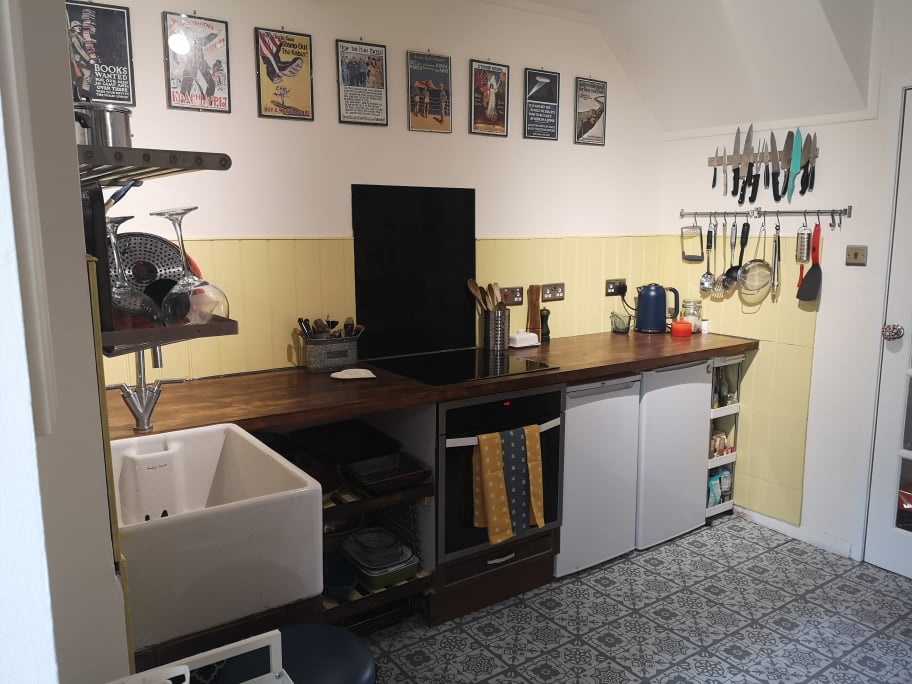
I then painted the paneling and the walls and ceiling. I painted the paneling in Dayroom Yellow by Farrow and Ball, while the walls were Whimbourne White, also from Farrow and Ball. Obviously, I could not afford to buy Farrow and Ball paint, so I bought the testers from Farrow and Ball and then got them mixed by the Decorating Centre online. As well as buying an eggshell for the paneling in Dayroom Yellow, I bought some emulsion of this colour and painted it onto one wall in the backroom, the wall opposite the french doors into the garden. I also got my lovely electrician to come round and replace all the plug and light sockets with lovely shiny new ones, and fit a new light fitting.
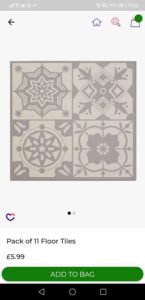
It was then time to do the floor. I had already tried to change the taps twice, unsuccessfully, and really appreciated the fact that I had tiled floors throughout the ground floor. During one of my unsuccessful attempts, the water was pooling at the front door. But the red tiles are ugly (sorry Danny, I know you liked them, but they really are ugly), and they had to go. Even though I was only going for vinyl tiles, I was still on a really tight budget, and it all mounts up, so I chose these grey and cream tiles from Studio.
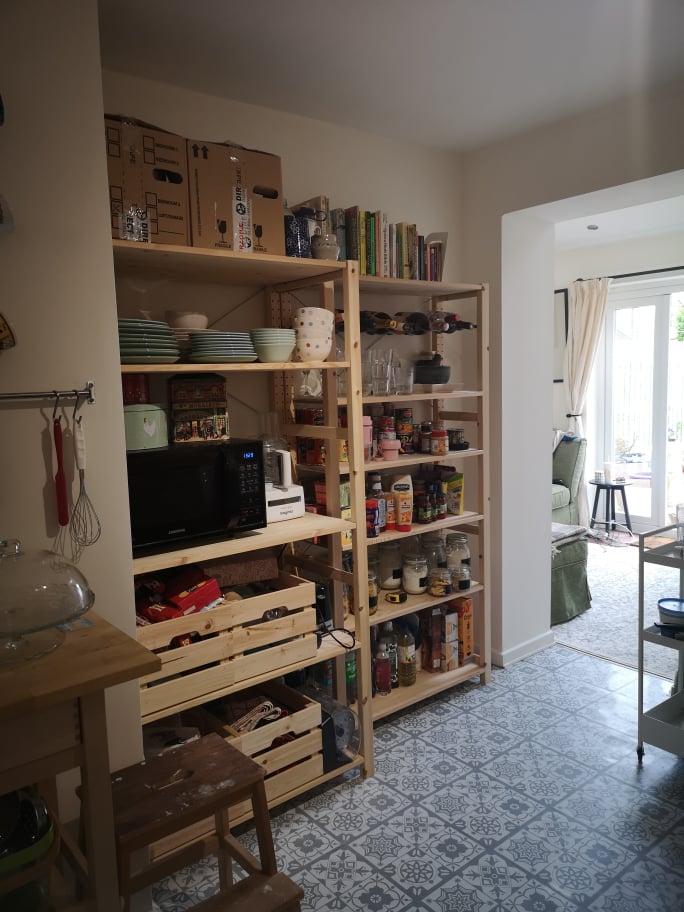
They go really nicely with the kitchen, and really compliment the yellow. Also, they are not blue, which is the main colour in my hallway, bedroom, and bathroom, so it was good to not have loads of blue in the kitchen. While the tiles were self adhesive, because my floor wasn’t completely flat, I also used glue to make sure they stayed in place.
I then bought a huge grey rug to carpet the back room, and offer continuity from the kitchen. All that was left to do was put up pictures, move everything back in, and dress the kitchen.
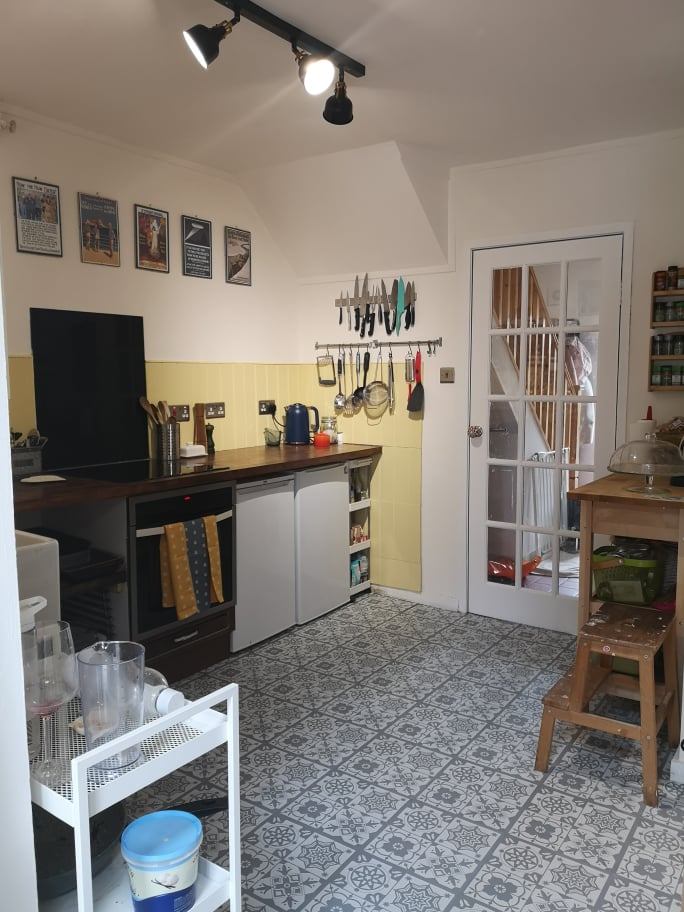
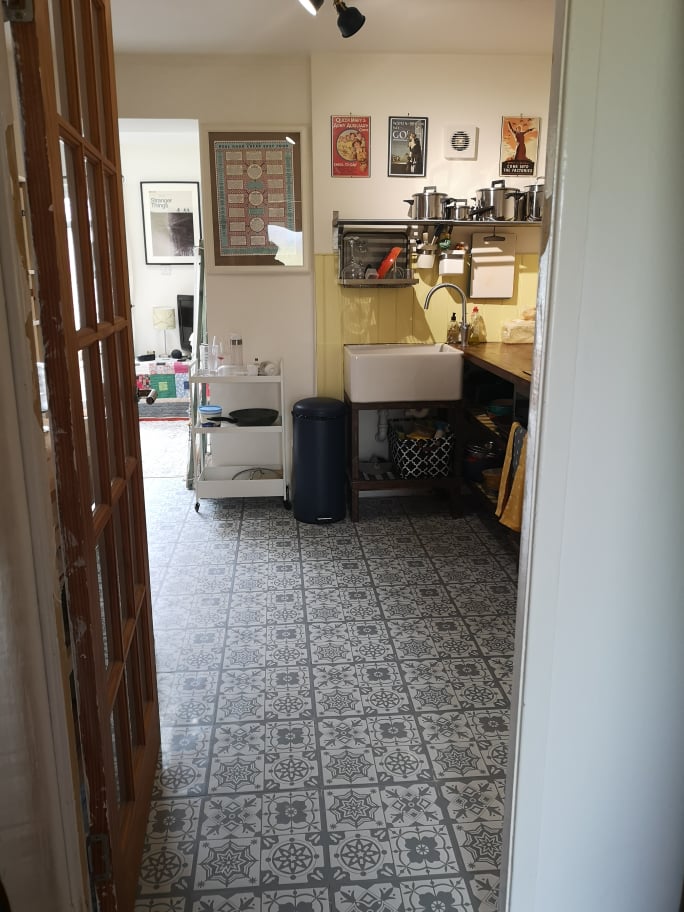
It certainly does look quite different, and because I put the Dayroom Yellow on one wall in the back room, when you sit on the sofa, you look past that colour to see the same colour beyond in the kitchen.